
.jpg)
Every great van conversion starts with a solid foundation.
At SK Conversions, we believe in doing it right the first time, and one of the most important early stages is insulation and lining.
There’s no one-size-fits-all solution — proper lining requires time, care, and expertise.
Our exclusive 5-stage lining package is designed to enhance both the comfort and feel of your van, whether it’s a work van, Kombi, Crew Van, or camper conversion.
Our exclusive 5-stage lining process is priced based on van size:
Medium Vans – Transporter, Transit, Vito, Vivaro, Trafic, etc.
Small Vans – Caddy, Connect, Berlingo, etc.
Large Vans – Crafter, Man TGE, Sprinter, Ducato, etc.


Our Exclusive 5-Stage Van Lining Process
Stage 1 – Sound Membrane Installation
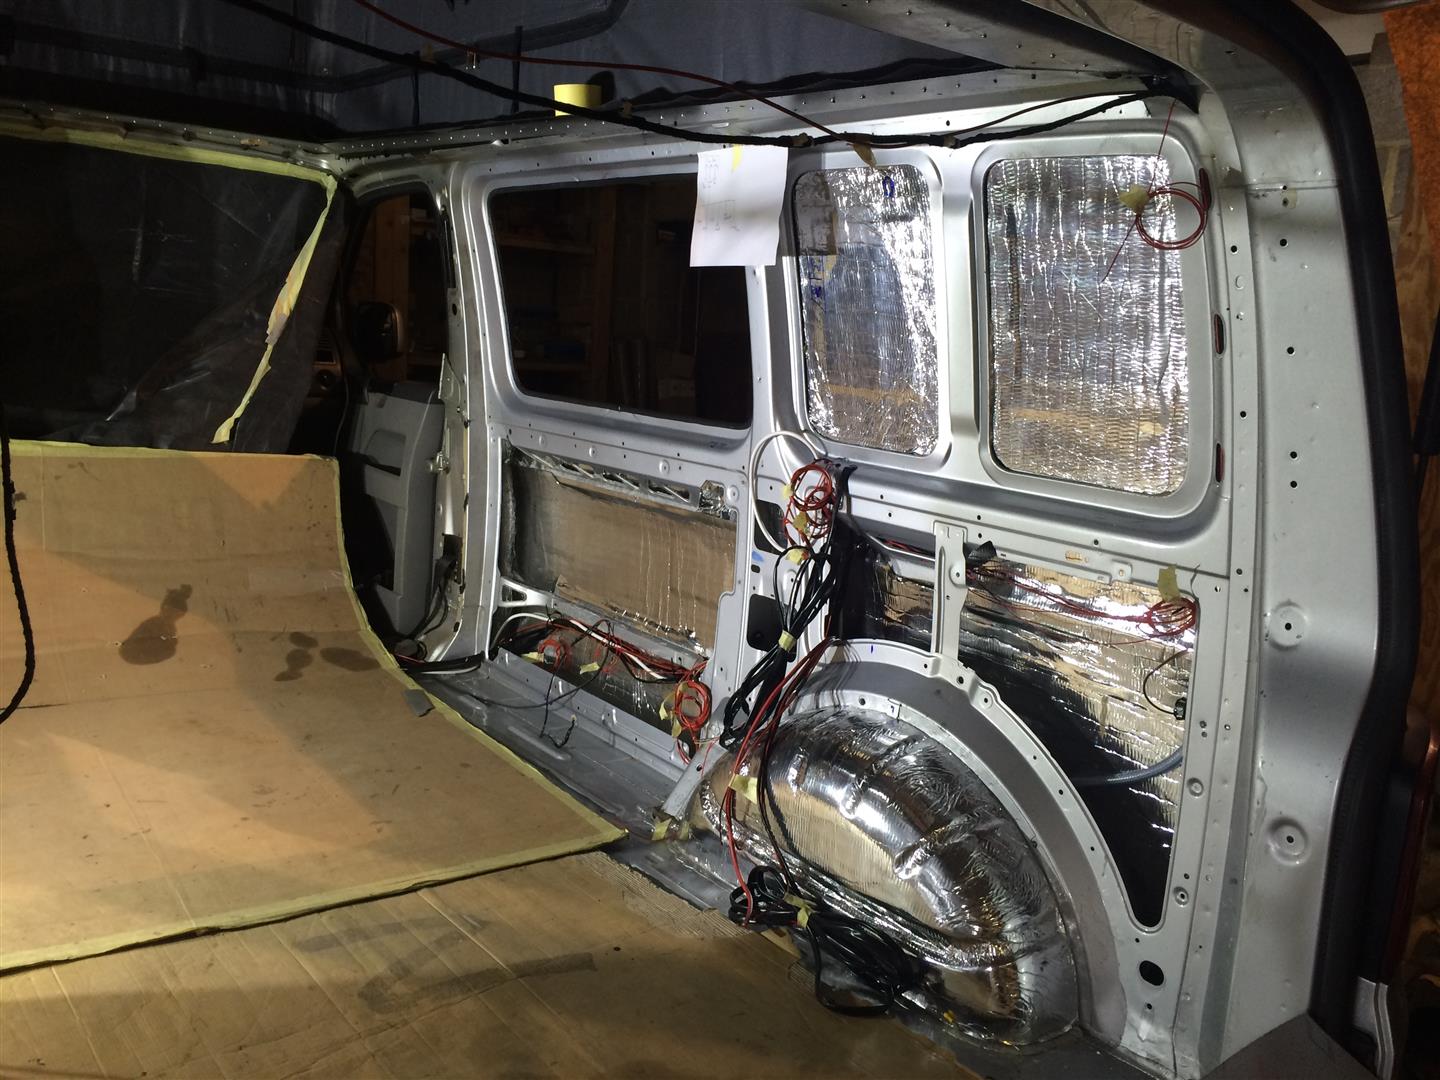
When we receive your van in a clean, empty state, we start with a thorough final clean-down to prepare all surfaces. Next, we install a 25dB-rated thermal sound-deadening membrane on all single-skin areas (excluding front doors). This first layer reduces panel drumming and road noise, creating a quieter and more comfortable van interior.
Stage 2 – Thermal Barrier
Once the sound membrane is in place, we apply a 7mm thick closed-cell foam with reflective silver foil backing. This thermal barrier helps regulate interior temperatures, keeping your van cooler in summer and warmer in winter.
Stage 3 – Bulk Insulation
We fill the wall and door cavities with 100% recycled bulk insulation. This forms the main thermal barrier of the van while further reducing road noise, improving comfort, and enhancing energy efficiency.
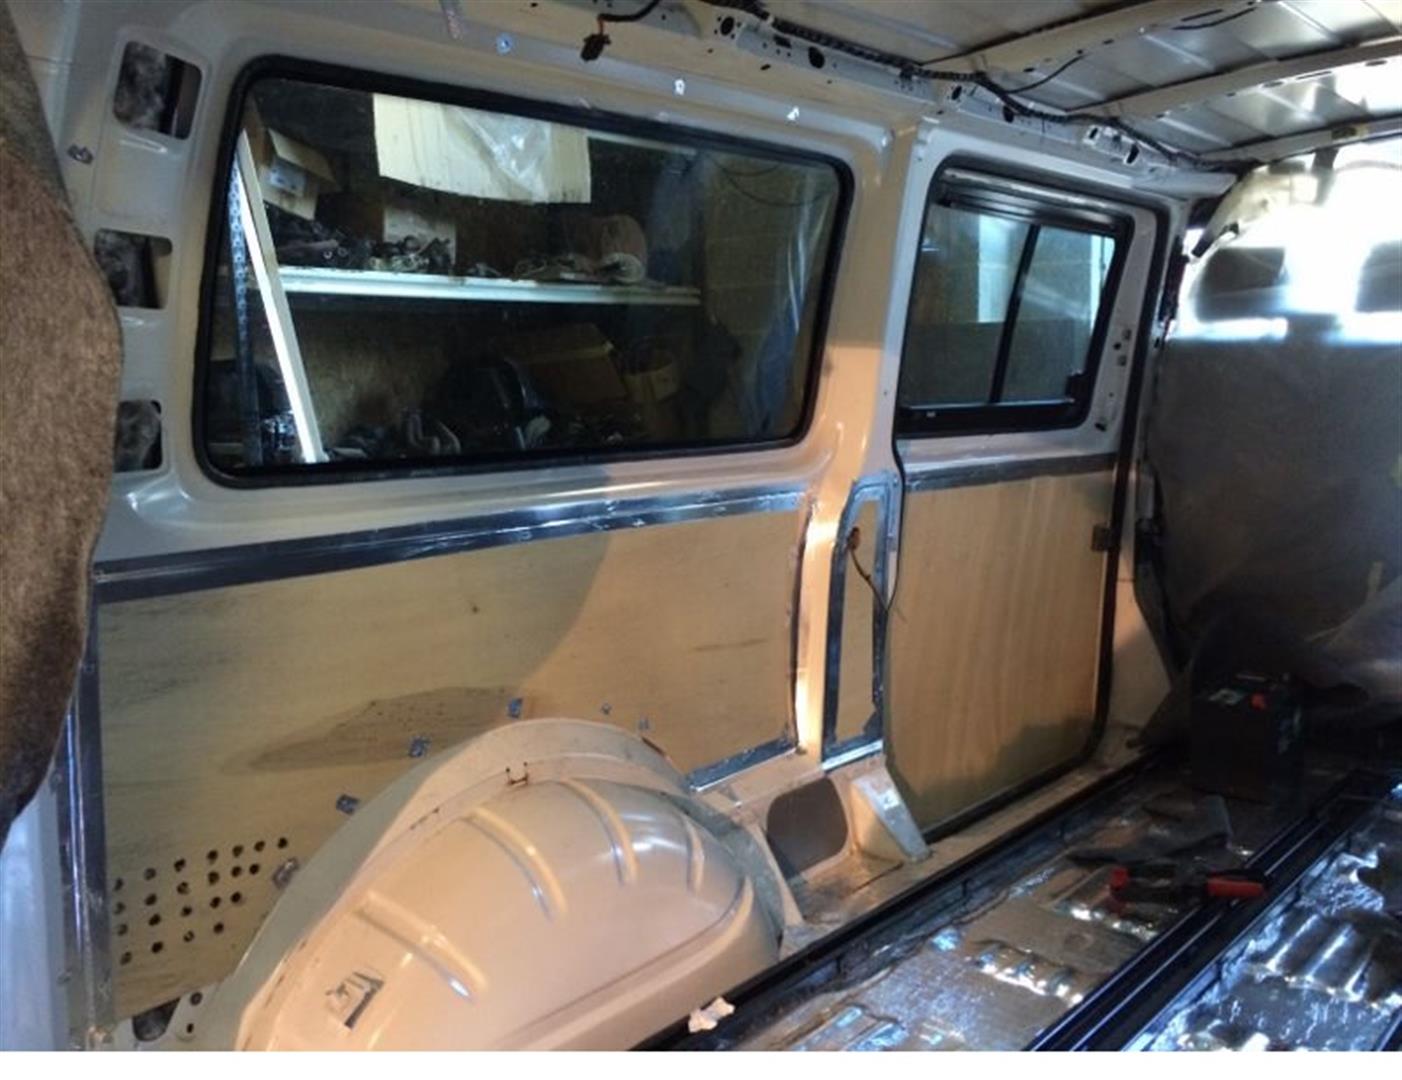
Stage 4 – CNC-Cut Plywood Panels & Finishing
Custom CNC-cut plywood panels are fitted to the sides and doors, providing a smooth base for the lining. These panels enhance noise reduction and trap insulation between the van metal and panels to optimize sound absorption.
All joints and holes are then taped to ensure neat edges, prevent dust or dirt entering the insulation, and avoid marks appearing on the carpet over time. Air circulation is maintained while keeping your lining clean and long-lasting.
Stage 5 – Carpet Finish & Final Touches
The final stage completes both sound protection and the visual finish. We carpet the full sides in a single piece, following the van’s lines for a smooth, coach-style finish without unsightly joins or overlaps.
Plywood door panels are also carpeted to match and attached with hidden clips. Several carpet colors are available to suit your style.
Removable panels are generally unnecessary, but if you plan to add electrical systems later, we can leave provisions or conduits in the walls to feed cables through when needed. For full or partial conversions, we run all required wiring into the wall space as standard, keeping your installation neat and future-proof.
Our exclusive 5-stage lining process is priced based on van size:
Medium Vans – Transporter, Transit, Vito, Vivaro, Trafic, etc.
Small Vans – Caddy, Connect, Berlingo, etc.
Large Vans – Crafter, Man TGE, Sprinter, Ducato, etc.
Our Exclusive 5-Stage Van Lining Process
Stage 1 – Sound Membrane Installation
When we receive your van in a clean, empty state, we start with a thorough final clean-down to prepare all surfaces. Next, we install a 25dB-rated thermal sound-deadening membrane on all single-skin areas (excluding front doors). This first layer reduces panel drumming and road noise, creating a quieter and more comfortable van interior.
Stage 2 – Thermal Barrier
Once the sound membrane is in place, we apply a 7mm thick closed-cell foam with reflective silver foil backing. This thermal barrier helps regulate interior temperatures, keeping your van cooler in summer and warmer in winter.
Stage 3 – Bulk Insulation
We fill the wall and door cavities with 100% recycled bulk insulation. This forms the main thermal barrier of the van while further reducing road noise, improving comfort, and enhancing energy efficiency.
Stage 4 – CNC-Cut Plywood Panels & Finishing
Custom CNC-cut plywood panels are fitted to the sides and doors, providing a smooth base for the lining. These panels enhance noise reduction and trap insulation between the van metal and panels to optimize sound absorption.
All joints and holes are then taped to ensure neat edges, prevent dust or dirt entering the insulation, and avoid marks appearing on the carpet over time. Air circulation is maintained while keeping your lining clean and long-lasting.
Stage 5 – Carpet Finish & Final Touches
The final stage completes both sound protection and the visual finish. We carpet the full sides in a single piece, following the van’s lines for a smooth, coach-style finish without unsightly joins or overlaps.
Plywood door panels are also carpeted to match and attached with hidden clips. Several carpet colors are available to suit your style.
Removable panels are generally unnecessary, but if you plan to add electrical systems later, we can leave provisions or conduits in the walls to feed cables through when needed. For full or partial conversions, we run all required wiring into the wall space as standard, keeping your installation neat and future-proof.